If you're looking to speed up your website, converting your PNGs to WebP is one of the smartest moves you can make. It’s a straightforward process that swaps out a legacy format for a modern, highly efficient one designed specifically for the web.
The payoff? Superior compression, which leads to much smaller file sizes and, ultimately, faster page load times. It’s a core part of modern web development for a reason—it boosts performance and SEO without sacrificing image quality, even with transparency.
Why Converting PNG to WebP Matters

Let's cut right to it. Switching from PNG to WebP isn't just a minor tweak; it’s a powerful optimization. The core benefit is simple: WebP gives you far better compression, meaning you get smaller files without a noticeable hit to visual quality.
This has a direct impact on your site's success. Smaller images mean your pages load faster. And in a world where users have zero patience, every millisecond counts. A slow site sends visitors bouncing before they even see your content, which tanks engagement and hurts conversions.
PNG vs WebP at a Glance
To see just how different these two formats are, here's a quick side-by-side comparison. It really highlights why WebP has become the go-to for performance-focused developers.
| Feature | PNG | WebP |
|---|---|---|
| Primary Use | High-quality graphics, logos, icons | Web graphics, photos, and animations |
| Compression | Lossless only | Both lossless and lossy |
| File Size | Larger | Significantly smaller (often 25-50% less) |
| Transparency | Excellent (8-bit alpha channel) | Excellent (8-bit alpha channel) with smaller file sizes |
| Animation | Not supported (APNG is an alternative) | Supported, offering a modern alternative to GIFs |
| Browser Support | Universal | Supported by all modern browsers (over 97% of global users) |
As you can see, WebP offers the best of both worlds—it retains the features that made PNG great, like high-quality transparency, while drastically improving on file size.
The Performance Advantage
Google didn't build the WebP format just for fun; they created it to make the web faster. It really shines in the areas where PNGs tend to create bottlenecks.
- Lossless Compression: For graphics where every pixel has to be perfect—think logos or technical diagrams—lossless WebP files are typically 25-30% smaller than the exact same image saved as a PNG.
- Lossy Compression: This is where WebP really pulls ahead. For more complex images, you can use lossy compression to slash file sizes by 50% or more while keeping the image looking sharp.
The real-world impact is huge. When YouTube switched its thumbnails to WebP, it saw page load times improve by a massive 10%. For anyone focused on Core Web Vitals, converting to WebP can easily bump up your PageSpeed Insights score by 5-10 points.
The bottom line is that faster websites provide a better user experience, which search engines like Google reward with higher rankings. Adopting WebP is a direct investment in both user satisfaction and SEO performance.
Handling Transparency Better
One of the main reasons developers have clung to PNGs for so long is their fantastic support for transparency. But that support comes at a cost: huge file sizes, especially for images with complex transparent backgrounds.
WebP was engineered to fix this exact problem. It supports lossless transparency with an 8-bit alpha channel, just like PNG, but its compression is so much more efficient that the final files are way smaller. This makes it perfect for modern web design elements like logos, icons, or hero images with transparent backgrounds.
Of course, managing all these optimized assets requires a solid storage strategy. It’s worth taking a moment to understand what object storage is and how it can help you manage a large library of media at scale. In the end, adopting WebP isn’t just about swapping one file extension for another—it’s about modernizing your entire approach to web performance.
Using Command-Line Tools for WebP Conversion
For developers who live and breathe in the terminal, command-line (CLI) tools offer the perfect mix of speed, control, and automation. Forget clicking through a clunky GUI—a single command can convert an image, or even an entire directory, in seconds. This approach is a lifesaver for scripting and build process integration.
The gold standard here is cwebp, the official encoder straight from Google's own libwebp library. It’s lightweight, incredibly powerful, and gives you fine-grained control over every detail of the conversion.
Getting Started with cwebp Installation
Before you can crush those PNG file sizes, you'll need to install the libwebp package, which bundles the cwebp utility. Thankfully, getting it set up is a breeze on most systems.
- On macOS with Homebrew: This is the easiest route for Mac users. Just pop open your terminal and run
brew install webp. Homebrew takes care of the rest. - On Linux (Debian/Ubuntu): The
aptpackage manager is your friend. The command is simplysudo apt-get install webp. - On Windows: You can grab the pre-compiled libraries directly from Google's repository. Find the latest release, download the right
.zipfile for your system, and unzip it. For maximum convenience, add thebindirectory to your system's PATH so you can runcwebpfrom anywhere.
Once it's installed, a quick cwebp -version in your terminal will confirm everything is working. If you see a version number, you're good to go.
Your First PNG to WebP Conversion
Let's dive right in with the most basic command. Say you have a file named logo.png you want to convert.
The command is as simple as it gets:
cwebp logo.png -o logo.webp
So what’s happening here? You're telling the cwebp tool to take logo.png as the input, and the -o flag specifies the output file, which we've named logo.webp. That's it. The tool does its magic and drops a fresh WebP image in the same directory.
Fine-Tuning Your Conversion
Just converting a file is one thing, but the real power of cwebp lies in its optional flags. This is where you can dial in the perfect balance between image quality and file size.
Here are the most important flags you'll find yourself using constantly:
- Adjusting Quality (
-q): This is your go-to flag. It sets the quality level from 0 (low) to 100 (best). For most web assets, a value around 80 is a fantastic starting point. A command would look likecwebp -q 80 input.png -o output.webp. - Controlling Effort (
-m): This flag balances encoding speed against file size, with a range from 0 (fastest, bigger file) to 6 (slowest, smallest file). When you're prepping production assets, always go for-m 6to squeeze out every last byte. - Using Lossless Compression (
-lossless): Need to preserve every single pixel? If you're working with a sharp logo or detailed icon, the-losslessflag is what you want. Even in lossless mode, you can expect a file size that's 25-30% smaller than the original PNG.
By combining these, you get incredible control. For instance,
cwebp -q 85 -m 6 transparent-logo.png -o transparent-logo.webpis a solid command for creating a high-quality, heavily compressed WebP image that still retains its transparency.
Batch Converting an Entire Directory
Converting images one by one is fine for a handful, but what about a folder with hundreds of PNGs? This is where the command line shines.
For Linux and macOS users, a simple for loop is your best friend. Just navigate to your images directory and unleash this one-liner:
for file in *.png; do cwebp "$file" -o "${file%.png}.webp"; done
This tiny script is a powerhouse. It finds every file ending in .png, runs cwebp on it, and saves a new version with the same name but a .webp extension. It turns a mind-numbingly tedious task into a fully automated workflow. It’s a huge timesaver.
Integrating WebP Conversion Into Your Code
While command-line tools are great for one-off tasks or simple scripts, the real magic happens when you bake the conversion process directly into your application. This is where you move from manual work to true automation.
For developers, this means you can handle image uploads, process assets during a build step, or generate thumbnails on the fly—all without ever leaving your codebase. It’s the perfect setup for web apps, content management systems, or any service where images are central. By using a library, you get full programmatic control over every little detail of the conversion.
High-Performance Conversion with Sharp
When you're working in the Node.js world and need speed, one library blows the competition away: Sharp. It’s built on the incredibly fast libvips image processing library, which makes it a powerhouse for performance.
Getting it up and running is straightforward. Just add it to your project:
npm install sharp
Once it's installed, converting a PNG to WebP takes just a few lines. I’ve always appreciated its clean, chainable API—it just makes the code so much more readable.
Here’s a quick, practical example of how you could convert a file named hero-banner.png:
const sharp = require('sharp');
async function convertImage() {
try {
await sharp('hero-banner.png')
.webp({ quality: 80 }) // Set WebP quality to 80
.toFile('hero-banner.webp');
console.log('Successfully converted PNG to WebP!');
} catch (err) {
console.error('Error converting image:', err);
}
}
convertImage();
This snippet simply reads the PNG, applies a WebP conversion with a quality of 80, and saves the new file. It's the kind of server-side logic you'd use to process images uploaded by users.
This screenshot highlights that powerful, chainable API that makes Sharp so popular. You can resize, rotate, and convert an image in a single, elegant operation.
This kind of programmatic optimization is more important than ever. The average web page size hit around 2.5MB in 2024, and oversized PNGs are often the culprit. WebP offers a huge advantage here, compressing images 42% better than the standard PNG library and creating files that are 26% smaller even in lossless mode. You can dig into these numbers over on Shopify's blog.
Integrating with Build Tools Using imagemin-webp
For front-end developers, conversions often happen as part of a build pipeline with tools like Webpack or Gulp. This is where the imagemin ecosystem really shines. The imagemin-webp plugin lets you slide WebP conversion right into your existing asset optimization workflow.
Here’s what that looks like in a Gulp task:
const gulp = require('gulp');
const imagemin = require('gulp-imagemin');
const webp = require('imagemin-webp');
gulp.task('images', () => {
return gulp.src('src/images/*.png')
.pipe(imagemin([
webp({quality: 75})
]))
.pipe(gulp.dest('dist/images'));
});
In this setup, Gulp automatically grabs all the PNGs in the src/images folder, runs them through the imagemin-webp plugin, and spits out optimized WebP files into dist/images. It’s a classic "set it and forget it" solution for any front-end project.
Pro Tip: I recommend using lossless conversion for critical UI elements like icons or logos where you need pixel-perfect rendering. For photos, a lossy quality setting between 75 and 85 usually hits the sweet spot between file size and visual quality.
Beyond JavaScript: The Core of libwebp
While Sharp and imagemin are fantastic for Node.js, they're both built on top of Google's foundational C/C++ library, libwebp. This is the same engine that powers the cwebp command-line tool we looked at earlier.
If you’re working in other languages like Python, Go, or Ruby, you can find wrappers for libwebp that let you perform the same high-speed conversions. This ensures that no matter your tech stack, you can bake efficient PNG-to-WebP conversion right into your application. This is especially useful for automated systems, like those that process images stored in cloud object storage. You can read more about managing cloud assets in our articles on S3. At the end of the day, it's this core library that makes modern image optimization possible for everyone.
Building Automated Conversion Workflows
Running commands by hand or converting images one at a time is fine for a handful of files, but it hits a wall fast. To really get a handle on your media pipeline, you need automation. Building a workflow that handles PNG to WebP conversion for you saves an incredible amount of time and makes sure every image on your site is optimized without you even thinking about it.
These "set-it-and-forget-it" systems can plug right into your development process or your cloud setup. The goal is simple: a new PNG gets added, and its optimized WebP version just appears, ready for production, with zero manual effort.
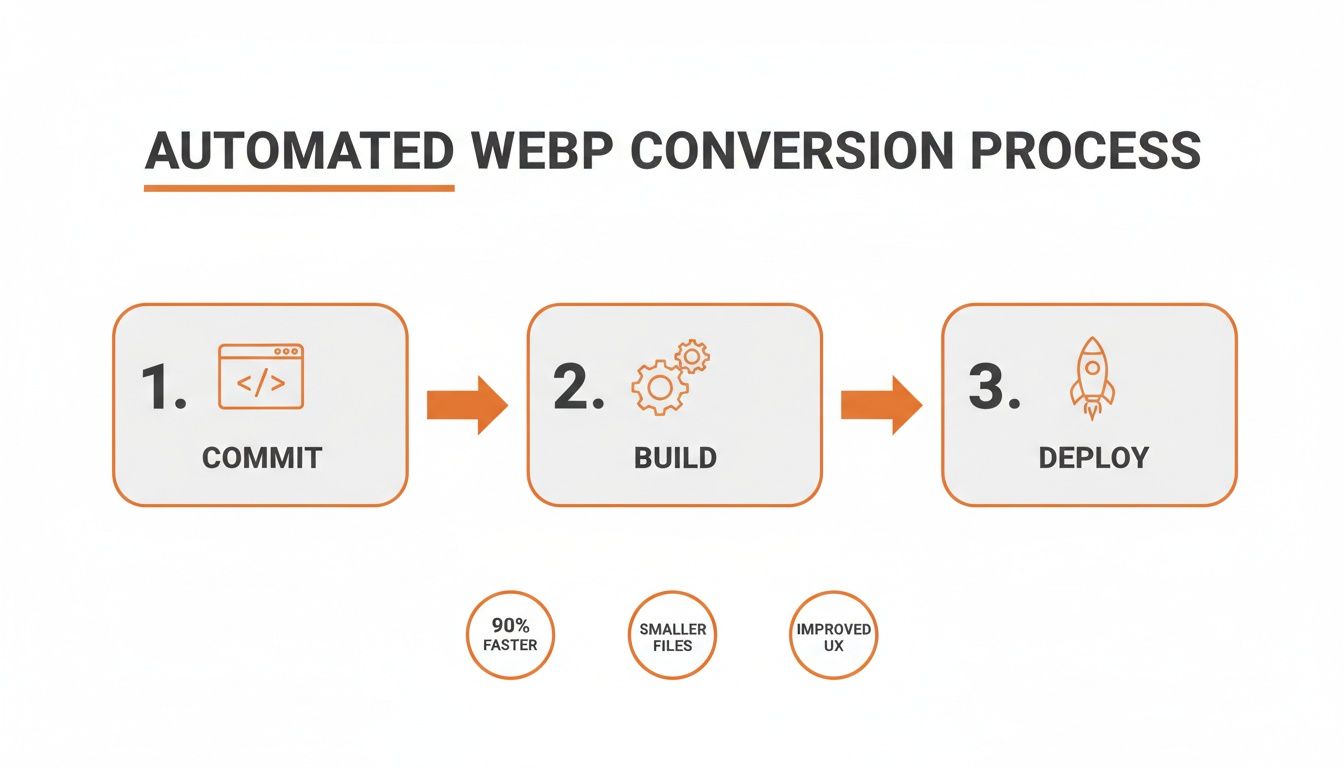
Automating with CI/CD and GitHub Actions
For dev teams, one of the best places to automate this stuff is inside a CI/CD pipeline. GitHub Actions is perfect for this. You can set up a workflow that watches for new PNG commits, converts them on the fly, and pushes the WebP versions right back to your repository.
Think about it: a designer can drop a new PNG asset into the project, and by the time that branch is merged, the optimized WebP is already there. It completely takes the developer out of the loop for asset optimization.
Here’s a real-world example of a GitHub Actions workflow file (.github/workflows/image-conversion.yml) that does exactly that:
name: Convert PNG to WebP
on:
push:
branches:
– main
paths:
– '**.png'
jobs:
convert:
runs-on: ubuntu-latest
steps:
– name: Checkout Repository
uses: actions/checkout@v3
  - name: Find and Convert PNGs
    run: |
      find . -name "*.png" -exec sh -c 'cwebp -q 80 "$0" -o "${0%.png}.webp"' {} ;

  - name: Commit WebP Files
    run: |
      git config --global user.name 'GitHub Actions Bot'
      git config --global user.email 'actions-bot@github.com'
      git add *.webp
      git commit -m "chore: Automatically convert PNGs to WebP" || echo "No changes to commit"
      git push
This workflow kicks off on any push to the main branch that includes a PNG, uses cwebp to convert it, and then commits the new WebP file back into the project. Simple and effective.
Cloud-Based Automation with AWS S3 and Lambda
When you're dealing with a ton of user-generated content or dynamic assets, a cloud-based approach is your best bet. A classic, powerful setup is using AWS S3 for storage and AWS Lambda for serverless processing.
The workflow is beautifully straightforward:
- Trigger: An event fires the moment a new
.pngfile lands in a specific S3 bucket (your "source" bucket). - Process: That event triggers a Lambda function. The function's code grabs the PNG, converts it to WebP using a library like Sharp, and uploads the new
.webpfile to a different S3 bucket (your "destination" bucket). - Result: Your app can now serve the super-optimized WebP images from the destination bucket, leaving your original PNGs untouched as backups.
This serverless architecture is incredibly efficient. You only pay for compute time when the Lambda is actually running—which is usually just milliseconds per image.
This is the backbone of modern, scalable media platforms. It separates your image processing from your main application, so even a huge flood of image uploads won't slow down your core services.
Simplifying Cloud Workflows with Specialized Tools
While rolling your own Lambda function gives you total control, it's not always the right move. The reality is that many teams don't have the time or deep expertise to build and maintain this kind of serverless infrastructure from the ground up. That's where specialized tools come in.
Platforms built for S3 management often have these automated workflows baked right in, so you don't have to write any code. For instance, a tool like Bucket Gorilla can automate the entire conversion and upload process. You can just point it at a folder and let it handle the PNG to WebP conversion in the background.
This approach gives you all the power of cloud automation without the headaches. For anyone managing lots of assets, it’s worth looking into different strategies for S3 optimization to find the right mix of custom code versus ready-made solutions. The goal is always the same: a fast, efficient, and fully automated image pipeline.
Managing Quality and Transparency Like a Pro
Flipping a PNG to WebP isn't just a simple file conversion; it's really an art. You're constantly balancing visual sharpness with raw performance, and getting it right is what separates a good website from a great one. Nailing this balance ensures your site is both beautiful and blazing fast.
The heart of the process is the quality setting. When you use lossy WebP compression, you're essentially telling the encoder how much visual data it can throw away. A high setting, like -q 90, will look nearly identical to the original PNG but will only give you a small drop in file size.
On the other hand, a much lower setting like -q 50 will shrink the file dramatically, but you risk seeing compression artifacts—that ugly blockiness or weird color banding. The trick is to find the sweet spot for each specific image.
Finding Your Quality Sweet Spot
There is no magic number that works for every image. It all comes down to the image's content and where it lives on your site. A big, front-and-center hero image might demand a quality of 85 to stay crisp, while a subtle background texture could look perfectly fine at 60.
My go-to workflow is to start at -q 80 and then tweak from there. I'll eyeball the result and ask myself, "Is the extra file size saving worth any visual trade-off?" You'd be surprised how often a small drop from 80 to 75 can slash another 15-20% off the file size with virtually no perceptible loss.
The goal isn't just to make files smaller—it's to make them as small as possible without degrading the user experience. Always pull up the original PNG and the new WebP side-by-side to make a smart call.
This is where automation becomes your best friend. Integrating these quality decisions into a CI/CD pipeline means every image gets optimized perfectly without you lifting a finger.
This kind of "set-it-and-forget-it" process makes optimization a seamless part of your development cycle, guaranteeing every asset is lean before it ever hits production.
The table below gives you a practical look at how different quality settings affect the final file size.
WebP Quality Settings and Their Impact
| Quality Setting (cwebp -q) | Typical Use Case | Expected File Size Reduction vs PNG |
|---|---|---|
| 90-100 (Lossless) | Archival quality, medical imaging, detailed logos. | 10-30% (Identical quality) |
| 80-89 | Hero images, product photos, high-impact visuals. | 40-60% |
| 70-79 | General website images, blog post illustrations. | 60-75% |
| 50-69 | Background textures, less critical UI elements. | 75-90% |
As you can see, even a moderate quality setting like 75 delivers massive savings, making it a fantastic starting point for most web graphics.
Mastering Transparency Preservation
One of the main reasons developers stuck with PNG for so long was its rock-solid handling of transparency. The good news? WebP not only matches this but often does it better by creating much smaller files. Just like PNG, WebP supports a full 8-bit alpha channel, meaning it can handle those complex, feathered edges with no problem at all.
This is where WebP's lossless mode really shines. When you convert a PNG that has transparent areas, the lossless WebP format uses more advanced compression that can shrink the file by up to 26% compared to the original PNG—with zero loss in quality. That’s a huge win for modern web design, where transparent logos, icons, and graphics are everywhere.
This efficiency is a big part of why the format has taken off since Google launched it back in 2010. Today, with over 96% browser support, there's little reason not to use WebP to boost your PageSpeed scores—a key ranking factor since 2021. You can learn more about WebP's impact on website performance to see just how much of a difference it makes.
Troubleshooting Common Conversion Issues
Most of the time, the conversion is painless. But every now and then, you'll hit a snag. Here’s how to fix the common ones without pulling your hair out.
- Color Profile Shifts: Ever notice the colors look a little… off? This usually happens when the original PNG has an embedded color profile (like sRGB) that gets lost in translation. Make sure your conversion tool is configured to preserve color profiles to keep everything looking consistent.
- Artifacts in Low-Quality Images: If you get too aggressive with the quality setting, you'll see it. Weird blocky patches or banding might appear, especially around sharp edges or in smooth gradients. The only fix here is to dial the quality back up until the glitches vanish.
- Mishandled Alpha Channel: In rare cases, a tool might bungle the transparency, leaving you with jagged edges or a solid black background. If that happens, your best bet is to try a different tool (like switching from a library to the official
cwebpcommand) or forcing the conversion into lossless mode, which almost always handles transparency perfectly.
Common Questions About PNG to WebP
Jumping into a new format like WebP is a smart move, but it’s completely normal to have a few questions before you go all-in. Let's tackle some of the most common things people ask when they're figuring out how to convert PNG to WebP.
Getting these details sorted will help you switch with total confidence.
Do All Browsers Actually Support WebP?
This is usually the first question on everyone's mind, and the answer is a resounding yes. WebP support is practically universal now. Over 97% of web users are on a browser that handles WebP perfectly, including modern versions of Chrome, Safari, Firefox, and Edge.
The days of needing complicated fallbacks are pretty much over. While a few ancient browser versions might not render WebP, that audience is tiny and shrinking by the second. For all practical purposes, you can serve WebP images and know almost everyone will see them just fine.
Will My Images Look Worse After Converting to WebP?
Not if you do it right! The best part about WebP is the control it gives you. You can dial in the perfect balance between a tiny file size and pixel-perfect quality.
Here’s a simple way to look at it:
- Lossless WebP: Think of this as a direct, visually identical replacement for PNG. It doesn't throw away any pixel data, it just organizes it more efficiently. You get a file that's 26% smaller on average with zero quality loss.
- Lossy WebP: This is where the real magic happens. By choosing a quality setting (like
80out of100), you can shrink file sizes dramatically—often by 60-75% compared to the original PNG. The trick is finding that sweet spot where the file is tiny, but the visual difference is impossible to spot.
The goal is smart compression. For a sharp logo, always go lossless. For a detailed photo, a lossy quality of 80 usually delivers massive savings with no noticeable drop in quality.
Can I Get My PNG Back from a WebP File?
Absolutely. This isn't a one-way street. Just like Google's cwebp tool converts images to WebP, their dwebp utility converts them right back from WebP to formats like PNG. Your original image data isn't locked away forever.
A simple command like dwebp image.webp -o image.png is all it takes. Plenty of image editors and online converters can handle this reverse process, too, so you can always get a PNG back when you need one.
Is WebP Always a Better Choice Than PNG for Transparency?
When it comes to the web, the answer is almost always yes. WebP was built from the ground up to handle transparency more efficiently than PNG. A PNG with an alpha channel can get pretty hefty, but a lossless WebP with the exact same transparency will be much smaller.
This means you get the same crisp, clean edges on your icons and graphics without the file size penalty. That smaller file loads faster, which is the whole reason we're doing this in the first place.
Managing, converting, and deploying your image assets shouldn't be a chore. With Bucket Gorilla, you can automate the entire PNG-to-WebP conversion and upload process, ensuring your S3 buckets are always clean, organized, and optimized for performance. Try our 14-day free trial and see how much time you can save.
Article created using Outrank